In the modern world, the camera in a smartphone has become a thing, life without which is almost impossible to imagine. Capture a particularly important moment, scan a text, make a video call to loved ones. This is not a complete list of ways to use the camera on mobile devices. But sometimes the camera on the phone does not work for unknown reasons. Let's figure it out.
In many modern gadgets, manufacturers install two (or even three) cameras at once - front and rear. The first one is mainly used for communication or taking selfies. The second is for photographing the surrounding world.

Although today's technologies make it possible to create high-quality, reliable hardware for smartphones that should serve stably and for a long time, users may still encounter certain problems. When an average user discovers that the camera of his device has stopped working, he usually does not know what to do. Honestly, there can be many possible faults. With the help of this article we will try to analyze each one.
Rebooting the equipment is the first thing to do when faced with incorrect camera operation. The gadget could simply have crashed or the application might have frozen. Sometimes such errors can be cured by simply turning the device on and off. After holding down the lock button, a context menu should appear where you need to select “reboot”. If a regular reboot does not produce any positive results, you should be patient and try other methods, which will be discussed below.

If the photography application does not launch, there is a chance that the problem is not even hidden in the phone itself. Check the integrity of the memory card on which photos and videos are automatically saved. Be sure to try inserting another memory card and starting the camera again.
The second stage is to make sure there is enough free space for recording in the internal or external storage, because modern smartphones create very high-resolution images, and this negatively affects the weight of media files.
There is always a possibility that the camera module itself has suffered mechanical damage (that is, a hardware problem). Lenses are the most vulnerable and fragile component of mobile devices. A mobile device may stop taking pictures after falling - under such circumstances, the module usually breaks or the cable cracks, the lenses break, or the light sensors are damaged.
But other mechanical damage is also possible: the cable connecting the lens module to the motherboard could burn out, moisture or dust could get into the lens, significant physical damage was caused to the gadget, after which failures and errors begin one after another.

In such a situation, attempts to deal with the breakdown on your own can lead to new negative consequences for the device, so the only thing left to do is contact a specialist or company that carries out certified repairs of mobile equipment. Fortunately, there are many of these today - in any large shopping centers you can find several “workshop islands” where the health of your smartphone can be diagnosed in a matter of minutes.
Of course, you shouldn’t rush into mechanical repairs right away, because the reason could still be software. First, you should try installing an alternative utility for the camera instead of the standard one in order to test the functionality of the old module on it. If everything works as it should in the new application, then the start of the malfunction is most likely the clogged cache memory of your device; to fix this, you just need to delete the old cache from the settings of your favorite application. To delete the cache you need

The second most common software malfunction is an automatically installed update containing certain bugs that prevent the user from starting the camera for various reasons. In this case, we return to factory settings.
Please note that after resetting to factory settings, all files, passwords, contacts will be permanently deleted from your device, so first make a backup copy of stored important information.
Sometimes a faulty gadget should be checked for viruses. Perhaps they were the cause of all the troubles: the open source Android OS has its own vulnerabilities that can be exploited by attackers, for example, blocking the operation of a mobile camera. There is a lot of proven antivirus software on Google Play (by the way, there is plenty of free one too). Download the applications you like, run the test, and wait for the result.
It is necessary to take into account that malicious files on the gadget itself can interfere with the correct operation of security software, so it will be useful to connect the smartphone to a desktop or laptop in order to perform a more thorough virus scan using computer programs.

The next method is to flash the device, which should absolutely help with the hardware failure of the smartphone. You can do it yourself, but you should be careful: a failure in data transfer or failure by the user to comply with all points of this operation can completely disable the phone. You can only download the firmware from official websites; only this guarantees a real signature of the new software license. Please note that after flashing, your smartphone (even if purchased just a few days ago) will lose mandatory warranty service from the service center.
When none of the above tips bring the desired effect, do not despair: seek help from a qualified specialist or return your phone under warranty to a service center, where they will carry out a full diagnostic of the device free of charge and, if a software malfunction is detected, it will be fixed at the manufacturer’s expense.
Also, if a device is found to have a manufacturing defect that interferes with the correct operation of the camera, the faulty device will be replaced with a new one. It is important to understand that the warranty does not cover mechanical damage to the mobile device that occurred through the fault of the owner himself, that is, you have every right to refuse repair or exchange.

So, this article listed all the possible causes of a phone camera malfunction. You should never despair and panic: as you can see for yourself, there are no hopeless situations - there is always a chance to return your favorite phone to full functionality. We hope that this material will remain nothing more than informational for you and you will never personally encounter the problem of the camera not working on your gadget. Happy shooting!
Question from a user
Good afternoon.
Tell me how to get the webcam to work. It seems like I already downloaded the driver, reinstalled it 10 times - but it still doesn’t work (it only shows a black screen). What else could be wrong?
Good day!
Yes, today's Internet no longer surprises anyone with streaming videos, webcams, etc. In general, in general, there are not so many problems with webcams, and by following a simple series of steps you can eliminate the reason for its inoperability (unless, of course, it is related to the hardware component - after all, your webcam could simply break down).
1) The camera is simply not active...
By default, the webcam in a laptop is always on and power is supplied to it (it’s just not active in real time - after all, you don’t always need the camera, but only when talking on the Internet, or when recording video).
And for it to start taking images, you just need to launch some application that uses it.
For example, in Windows 10 there is such a program as “Camera”. It's in the START menu.

If you have Windows 7/8, then some problem may arise - because... they do not have a built-in basic program for working with a webcam. In this case, you can use Skype or Media Player Classic(which is present in every codec set).
Addition! About where to download normal Media Player Classic -
Using Media Player Classic as an example, I’ll show you how to open an image from a webcam in it (relevant for all versions of Windows).
After installing the program, go to its settings: "View/Settings" . In the “Capture” section, indicate your camera in the “Video” column, the microphone in the audio column, and “Russia” in the country (it should look something like what I have in the screenshot below).


If everything is fine with the camera, the image should appear in the player window.

2) Drivers are not installed
If the image from the webcam is not transmitted, then very often the reason for this is the drivers (or rather, their absence). To see if the driver is installed on the system, open device Manager (press the combination Win+Pause and in the menu on the left you will see a link to launch it).
In Device Manager, look at the tabs "Cameras" And "Other devices" .
If the driver is installed, then in the "Cameras" tab - the model of your device should be displayed, if there is no driver - then in "Other devices" you will see a mark with a yellow exclamation mark on some "Integrated WebCam"(see visual screenshot below).

Device Manager - checking if there is a driver for the webcam
To update the driver, you can try using the Windows function: right-click on “Camera” and select from the menu that appears.

3) It is turned off in Device Manager or Windows Control Panel
It is also worth noting that in addition to the lack of a driver, the camera can simply be disabled in the device manager. Pay attention to the icon: is there an arrow on it?

If you have Windows 10, then open the START menu and go to the settings section.

In chapter "Confidentiality" open the tab "Camera" and allow applications to use the hardware.
By the way, please note that at the bottom of the window you can specify applications individually, which can use the camera and which cannot.

4) Check the spec. laptop control centers, antivirus.
And there is one more point that may affect the operation of the webcam...
Some laptops have control centers (included with the drivers). They allow you to configure the laptop’s power supply, adjust its monitor (brightness, contrast, etc.), and fine-tune the keyboard and touchpad.
Often in such centers there are privacy (security) settings that may limit the use of a microphone and camera. I recommend checking this moment.

By the way, some antiviruses can also block the transmission of images from the camera, fearing that an attacker’s application will be able to gain control over it (and therefore receive confidential information about you). Try disabling your antivirus for a while.

PS
Alternative not obvious reasons
1) Check Is the camera taped over? or some kind of sticker. I have noticed this “trick” with some laptop users more than once - people are afraid that hackers (or tracking software) will be able to take pictures of their personal life and, just in case, they cover the camera. Naturally, in this case, the camera will not show anything other than a black screen...
2) Is the webcam busy? another application? It’s just that if you run two applications at the same time that “want” to use the camera, then perhaps nothing will be shown in one of them. Try restarting your PC (after previewing and turning off everything unnecessary), and use only the only software to view video from the camera.
3) Between the time you launch the program to display video from the webcam and the time you see the picture on the computer screen, 10-15 seconds may pass. ! Those. there is a certain pause. It’s just that many users launch the program and do not see the image after 2-3 seconds. - they believe that it does not work and are looking for the “cause” of the problem (which is not there!).
4) If all of the above did not help, maybe your camera is just broken(hardware reason). I would recommend that you buy an inexpensive external webcam (connected to a USB port) from some Chinese store (for example). If you catch a promotion (+ take advantage of cashback), you can spend mere trifles...
Additions on the topic are welcome...
That's all for now.
The situation in which nothing happens after connecting the webcam to the computer is familiar to many Windows users. After reading the information below, you will learn why the computer may not see the webcam, and what actions the user is recommended to take to resolve this problem.
Secondly, you need to make sure there are no problems with the computer itself, specifically with the USB connectors. To do this, connect any other gadget to the connector selected for connecting the webcam, or connect the webcam to another connector.
Third, make sure there are no factors interfering with the normal operation of the webcam. Remember: a webcam can only work fully in one application. If you enable 2 or more programs that use the webcam's resources, it will either not work as expected or will not turn on at all.
Note! If the webcam does not work in a particular application, but in other programs it copes with its main task normally, the problem lies directly in the problematic application. Go to the program settings and see if the image transfer settings are set correctly.
Note! The instructions remain relevant for all currently popular versions of the operating system: from XP to Windows 10. Minor differences may only be present in the names of some navigation items.
The situation with drivers is as follows:
The operating system initially contains many drivers for a wide variety of devices;
after connecting the webcam to the computer (the first, as you know, is a “plug and play” device), the system reads information about it and installs drivers on its own;
After successful installation of the drivers, the webcam starts working normally.
However, in some situations the described “scenario” fails. This usually happens when a user tries to connect a webcam from a little-known manufacturer to a computer, or when problems are discovered in the system itself.
There is only one solution: you need to install the drivers yourself. To do this, you need to go to the official website of the device manufacturer, find the driver for the webcam in the support section (usually there is an individual number on the box or in the instructions that allows you to quickly search) and download the suggested files. If the webcam comes with a disc, you won't have to do any of this. The work is completed by installing the drivers. To do this, the user needs to either run the file downloaded from the official website, or insert the disk from the kit and follow further instructions from the system.
Helpful advice! To prevent incompatibility issues, install drivers before connecting the webcam to your computer.
If installing the necessary software did not change the situation for the better, there is a high probability that the webcam is faulty. Preliminarily inspect its body for the presence of various switches and buttons - if there are any, turn them on and watch for changes. If this does not help, all that remains is to return the webcam for repairs or return it to the seller.
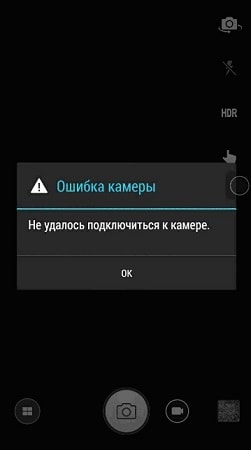
“Could not connect to the camera”: this error message is displayed on the screen when there is a problem accessing the camera of an Android device - a smartphone or tablet computer. More and more users are reporting that they are encountering this particular error. The difficulty is that there is no single solution to the problem, since it can be equally likely to be related to both the software and the hardware of the device.
It all starts with the fact that when you try to use the camera on your Android device, you first see a blank screen with a camera icon in the center, and then you receive the message “ Failed to connect to camera" Sometimes it is possible to use the camera after rebooting the device, but, as a rule, the frequency of the error increases, and soon it becomes simply impossible to use the photo module to take a couple of photos. Many users also complain that they receive a similar error message when trying to shoot video at the minimum resolution (240p). Is it possible to somehow improve the situation? Let's try to figure out what's happening together and find accessible ways to independently solve the problem.
To restart in safe mode:
If the camera works normally in safe mode, then you have narrowed down the search for the causes of the error. The problem is a conflict between third-party applications and system software. It is because of them that you cannot connect to the camera. Yours further actions:
C) Remove conflicting third-party applications
Try uninstalling third-party applications related to the camera. These are applications that can take pictures during their operation. For example: Snapchat, Whatsapp, etc. Surely there are programs on your smartphone or tablet with which you can take photos directly from the application and share them. Remove such programs sequentially, one after another, checking after each removal to see if the error has disappeared. If you were able to connect to the camera, you have found a third-party application conflicting with the system software. And one more thing: do not forget to switch between video, panoramic shooting and other modes during the test - the problem can appear in any of them, and it is important for us to restore the full functionality of the camera.
D) Try using a third party camera app
If the system app is the only program that has access to the camera on your Android device, and you receive the “Unable to connect to the camera” message, you might want to try using a third-party app to access it. The Google Play store offers many programs suitable for this purpose. Use the search function to find apps in the Camera category. Choose one of the popular applications - such as: Candy Camera, Open Camera, Camera 360, Camera MX or Camera for Android. Download and install the application, launch it.
If you managed to launch the camera from a third-party application downloaded from Google Play, then the problem lies in the official system application for it. Try to act in the following way:
These are the standard steps you can take when the app shows the error message “Failed to connect to camera”. Try using them all - it should help. And don’t forget to stop the application and restart it before each new attempt to connect the camera. The methods given here to fix the “Unable to connect to the camera” error do not carry the risk of losing saved photos and videos.
A) Clear cache and data
B) Uninstalling and reinstalling updates
Go to the same camera app settings as shown above. If there is an option to remove updates, do so. But remember that you should not use old versions of the apps, so you will have to visit the Play Store to update the camera app again.
B) Check permissions (Android Marshmallow only)
has a personalized system for allowing access to main applications. You must confirm that your camera app has permission to access the camera. Typically, if the required permission is missing, it is requested during application startup.
A) Clearing the cache
This action allows you to clear the device system of temporary data - outdated and only cluttering up the memory. This option is activated in Recovery mode, which becomes available after rebooting the phone using the bootloader.
To clear the cache, run the following actions:
Once clearing cache is completed successfully, restart your phone and try launching the camera app again. Please note that your Android device may have a different button combination for accessing maintenance and repair mode.
B) Factory reset
Resetting settings is considered the most drastic way to solve problems, as it entails complete loss of data. But if no other methods help, then you will simply be forced to use it. However, backup will help you save your data, and re-configuring the device will only strengthen your skills in working with Android devices. Here are two ways you can use to reset your phone or tablet to factory settings.
Method I: From the recovery menu
Method II: From System Settings
If none of these methods worked, then the problem most likely lies in the hardware of your Android device. You can return the phone or tablet back to the seller if the warranty period has not yet expired. Otherwise, you will have to contact the authorized service center of the gadget manufacturer or choose a repair shop with a good reputation, whose specialists will be able to understand the malfunction of the device. However, if you are not sure that the cause of the “Unable to connect to the camera” error does not depend on the hardware, then you can wait for the next operating system update. Sometimes after updating some problems resolve themselves. The only pity is that this happens extremely rarely.
Buying a modern tablet or smartphone allows you to get at your disposal not only a device for making calls, but also a compact pocket computer, and even a photo and video camera. However, it is the last element of the device that sometimes fails and does not turn on at the most inopportune moment. There are many reasons why this problem arises. And some of them the user can solve independently, without contacting the service.
Not the most popular, but quite serious cause of problems is the conflict of applications installed on the system. The situation can be corrected by uninstalling the last few programs one by one, checking that the camera starts after each one. Sometimes you have to uninstall even the program itself, designed for taking photos and videos, and install a new version - preferably from trusted sources.

A dirty camera lens can cause startup problems. Liquid or dust that gets on the glass spoils the focusing of the device, making it impossible to adjust the image. Although in such cases the application still starts, but then freezes or closes back. To correct the situation, the lens should be carefully cleaned with a special cloth (microfiber) and liquid used to clean the monitor.


 is placing emphasis on private labels")


