Windows has a standard backup and recovery tool that allows you to save as separate files, and the entire image from which you can restore the system in case of failure.
Go to the “Control Panel” by left-clicking on the “Start” button and selecting the appropriate item. In “Control Panel” select “System and Security” → “Backup computer data” → “Set up backup”.
Next, the system will ask you to specify a location to save the archive. Please note: if you want to backup data from drive C, you will not be able to save it there. To do this, you will have to select another medium, for example a second physical disk, flash drive, DVD or folder in local network. If we recall the principles of creating a backup, the archive must be stored on a separate medium, and not on the very computer from which the copy was made.
Next, the system will prompt you to automatically or manually select folders for archiving. Click on “Give me a choice” and in the window that opens, check the boxes for the folders you want to save. Click Next → Save settings and exit.
Now the “Archive” button appears in the “Backup or restore files” window. Clicking on it will start the process of archiving your data.

Recovery follows the same principle. To do this, click on the item “Select another backup to restore files” and indicate the one into which the backup was made.
The built-in File History tool allows for real-time archiving. For it to work, only initial setup is required.
Go to "Control Panel". To do this, click on the “Start” button with the right mouse button and context menu find the line you need.
As a storage location, select a disk other than the system one, a flash drive or network folder. Click Enable.
File History will automatically copy the following libraries: Documents, Music, Pictures, Videos - and standard folders user: Windows, Desktop, Favorites.
By default, backups are made every hour, but you can change this time, for example, to 10 minutes. However, this will require more volume disk space. The retention time for each copy can be configured in the Advanced Options menu.
Time Machine - standard solution Apple, designed to create backup copies of applications, files and folders, documents, videos, music.
To work with Time Machine, you will need third-party data storage, such as a flash drive, external HDD or network solution.
When connected external drive To Mac computer You should be prompted: should I use it as a backup storage? Select "Use as backup drive."

If the window does not appear, you must select the backup disk manually:

Backups will be automatically created once per hour, copies for the past month - every day, and backups for the entire time - every week. Don't be afraid that your volume hard drive it won't be enough. Time Machine will only save changed information, and old copies will be automatically deleted as disk space becomes full.
Designed to create data backups Google accounts. With its help you can save:
To create a backup you need:
To restore data on another device, just log in with your account. To restore the settings of saved applications, go to “Personal data” → “Recovery and reset” → “Auto recovery”.
Android has a native synchronization tool that allows you to save user contacts installed from Google Play apps, calendar, display settings, languages and input methods, Google data Drive and settings of some third-party applications. The tool requires a Google account.
Synchronization in Android is enabled by default. If you want to get the latest backup copy, do the following:


The data will automatically be sent to Google cloud storage. To restore them on another Android device, just connect your account to it.
You can also synchronize most popular accounts: Skype, Telegram, Viber and VKontakte. To sync photos and images, Android has a built-in Google Photo solution.
Universal Apple app to receive and play content. Allows you to locally save data from a device connected to a computer under Windows control or macOS. This is especially convenient when you do not have Internet access.
To create a copy when iTunes Help do the following:
Cloud service for storing user data. Like any cloud, it has two limitations: the need for Internet access and a relatively small (5 GB) amount of free allocated space.
To save data using iCloud on your device, open Settings → iCloud → Backup and start the process of creating a copy.
Saved in iCloud:
License: commercial software.
Russian language support: There is.
A simple solution for creating backups. Allows you to save both individual files (photos, music or movies) and mail files, for example from Microsoft Outlook or TheBat.
In the main program window, click “Create a new task” → “Create a backup copy”. From the directory tree, select the data you want to save. In our case, this will be the “Music” folder on the desktop.


Finally, give the task a name and click Finish. Archiving is complete.
Data recovery is performed using the same principle. Select the saved backup copy, and then select the location where you want to restore it.
The trial period for using the program is 30 days. The developers offer to purchase the full basic version for 800 rubles. There are other versions Handy Backup- Professional and Expert. Their capabilities are much wider and tailored to professional needs; for our purposes, the Standard version is quite sufficient.
License: shareware.
Russian language support: No.
Another solution for creating backups and recovering lost files. The interface is so simple and clear that even the lack of Russian language will not be an obstacle.
First of all, choose where to save your data. Let it be a removable drive E.

The next step is to specify the data to be saved. The program offers both a smart choice, where you can mark desktop files at once, system folders“Pictures” or “Video”, as well as the directory tree. Go to it and save the already familiar “Music” folder.

After clicking on the checkbox, the archiving window will open. On the selected drive, the program automatically creates a Genie TineLine folder, where it places the saved files.
Save and restore functions are available in the basic version of Genie Timeline Free. The advanced paid versions of Genie Timeline Home and Genie Timeline Pro have much greater capabilities: sending notifications by email, highly secure data encryption, and setting up a schedule. But for saving home files, the Free version is quite enough.
Genie TineLine has an iOS app that allows you to check the status of your backups on your computer.
License: commercial software.
Russian language support: There is.
A powerful tool for creating backups and restoring data. You can store backups not only on physical disks, but also on Acronis’s own cloud service. True, for this you will have to subscribe for a year, and the amount of space provided will depend on tariff plan. With a standard subscription, 50 GB are allocated, when purchasing a premium version - from 1 TB.
Immediately after installation, the program prompts you to choose what data to send to the copy: from the entire computer, from disks and partitions, or individual folders.

Select "Files and folders" and select the ones you need. Let this again be the “Music” folder on the desktop. Click "OK" and proceed to select storage.

Select flash drive E, click “OK” → “Create a copy” again. A copy of the “Music” folder has been created on a flash drive.
Acronis has others useful features. For example, “Archive” allows you to free up disk space by packing large files, and the “Disk Cloning” tool will create a complete copy of local disks, which will allow you to restore the system to its original state in the event of a failure.
The cost of the program is 2,700 rubles. A standard subscription for a year will cost users 2,400 rubles, an extended one - 5,100 rubles. Mobile applications work in conjunction with the desktop version and are downloaded for free.
License: commercial software.
Russian language support: No.
A utility for creating a duplicate disk. Russian language support is not provided, but understanding the interface will not be difficult.
In Source Disk, select the drive you want to copy. In Target Disk, specify the location to store the copy. Start the process with the Clone button.

The free period of using the program is 30 days. After Carbon Cope Cloner will cost 2,405.65 rubles.
License: shareware.
Russian language support: There is.
A convenient solution for creating backups and synchronizing applications on Android that does not require root rights. However, for full operation you will have to install Helium on a computer running Windows, Linux or macOS.
After installing the application on your smartphone, you will immediately receive a notification about the need for the desktop version. To make installation easier and save time, the program offers to send a link to a user-friendly messenger or email. From there follow the link to the program website, download and run. Installation in the style “Next” → “Next” → “OK” does not cause any difficulties.
While the program is installing, mobile app asks to connect the phone to the computer and enable USB debugging.


After receiving a notification about successful synchronization, you can disconnect your smartphone from the computer.
Open the mobile application. From the list installed programs select the ones you need and click on the “Reservation” button. Specify where the backup will be stored and wait for the process to complete.


To restore from a backup, go to the “Restore and Synchronization” tab, specify the storage location with the copy, select required applications and click "Recovery".
The basic version of the program is free, the cost of the extended version is 149.86 rubles.
The extended version allows:
Owners of Motorola devices and some Sony models will not be able to install the application.
License: shareware.
Russian language support: There is.
Most popular among Android users application backup tool. Requires root access to the device.
To create a backup copy of one or more applications, open the “Backups” tab, which provides a complete list of installed software. Exclamation mark near the application indicates that a copy has not yet been created for it. The phone icon means that the program is stored on internal memory devices. The SD card icon indicates applications stored on the memory card.
Select the application and click “Save” in the menu that opens.


The backup has been created. Now, if you enter the application again, you can see the “Restore” button.
Titanum Backup supports group work with applications and backups. To do this, go to “Menu” → “Batch actions”.
This function allows you to:
The functionality of Titanium Backup is much broader, but for our purposes the listed capabilities are quite sufficient.
The extended version of Titanium Backup costs 349 rubles. Its main features:
License: commercial software.
Russian language support: There is.
Compatibility: Microsoft Windows, macOS.
In fact, it is a file manager with backup capabilities. In many ways it is similar to iTunes, but working in it is much easier and more enjoyable. You can transfer data both via cable and via Wi-Fi, and in iMazing there is no limit on the number of connected devices.
When you connect your device to your computer, iMazing automatically makes a backup of it. The function of changing data directly in a saved copy is very useful: the next time you connect, the changed data is instantly synchronized.
The free period is 30 days, after which you will have to pay $39.99 for use on one computer.
License: commercial software.
Russian language support: No.
Compatibility: iOS.
A tool for backing up devices with . Allows you to save notes, contacts, photos, messages, call history and much more.
To create a backup, just select what you want to save and click on the corresponding icon. A copy can be stored on your smartphone, computer, in the cloud, or sent by email.
To restore data, click on the Restore button in the menu on the left side of the screen.


BackupAZ costs $2.99.
License: free software.
Russian language support: There is.
Compatibility: iOS.
And this one software will require you to have a jailbreak. Free app iLex allows you to save absolutely any data from your device, and you don’t need a computer to operate it.
Having created a backup copy, save it where it is convenient for you, and after flashing the device or in case of loss, copy the archive to your phone and restore the necessary information.


License: free software.
Russian language support: There is.
To do this, just go to Manage Accounts, enter your account and select Installable Purchases. But this can only be done for purchased applications. Cydia does not save information about free ones.
License: shareware.
Russian language support: There is.
Compatibility:
Allows you to store user data on Google servers, differentiate access rights to files and folders, open access and share them with other Internet users.
Storage includes:
15 GB is provided for free. For larger volumes you will have to pay from $2.99 to $299. The maximum storage capacity is 30 TB, and the maximum uploaded file is 5 TB.
For free use 2 GB storage available. The cost of 1 TB will be 9.99 euros. Unlimited space can be purchased for 10 euros per month.
License: shareware.
Russian language support: There is.
Compatibility: browsers, Microsoft Windows, macOS, Android, iOS.
Cloud service of Russian origin, former Yandex.People. Like previous solutions, it allows you to save data in the cloud and share it with other Internet users. Supports synchronization between different devices.
Users are provided with 10 GB free of charge. For an additional 10 GB, Yandex asks to pay an additional 30 rubles, for 100 GB - 80 rubles, and the cost of 1 TB will be only 200 rubles.
The loss or breakdown of a smartphone is a problem associated not only with inevitable financial expenses, but also with the loss large quantity personal data. It is impossible to restore everything accumulated after the fact: the only way resolution of such a situation is its anticipation.
The two most common ways to backup an iPhone are to use special functions iTunes and iCloud. Each of them has its own disadvantages and advantages.
However, in both cases, the basic data will be saved, and it is up to you to judge the best option.

In the future, backups will be created automatically when the phone is charging and wi-fi is connected.
To restore data on a new device, you just need to enter your Apple ID and password, after which the last backup saved in the cloud will valiantly migrate to your iPhone. If the device is already configured, you will need to erase all contents - this is the first and mandatory step. After this, follow the instructions that appear (for more details, see the article “”) for setting up until the “Programs and Data” screen appears; there you need to select “Recover from iCloud copies" Sign in and select the appropriate backup (note the date and size).
Perhaps during the copying process a window will appear asking you to install the latest iOS - complete it. Next, you need to log into your Apple ID account, which will allow you to restore all purchased programs and materials. The duration of the procedure varies widely: recovery takes from five minutes to several hours.

 Then, to create a backup, click create a copy now.
 If you want to save your information from the Health, Activity programs, then select the “encrypt backup” option.
 Once the copying is complete, you can see the result of the process in the Browse screen in iTunes.
Please note the dating and size of the copies. Click "Restore" and wait for the data recovery procedure to complete.
The above methods, based on iTunes and iCloud services, are not the only options for copying information. There are a lot of programs focused on similar activities, but in fact they are in no way superior to the above options. That is why it seems quite natural to “discard” them: we did not analyze such utilities in detail.
In order to ensure the maximum level of reliability, it is recommended to create copies in both iCloud and iTunes - then you can be sure that the information will be saved.
Good luck!
Even more interesting and useful things in the Telegram channel @proyabloko. Subscribe, it will be interesting!
The Windows 7 operating system has built-in archiving tools that allow you to back up your operating system. Windows systems and user data. Archiving will allow you to create a backup image of the system and other user data, with which you can restore the system after serious problems.
This article will provide an overview of using built-in backup tools. Windows copy 7. The built-in backup tools of the operating system, in their capabilities, can satisfy most computer users.
How to make a backup? There are quite a lot of backup programs, among them such popular programs as, Nero BackItUp, Norton Ghost, Paragon Drive Backup Professional,. You can also back up your system without any help. third party programs using Windows archiving and backup tools.
Why is it advisable to make backups? Because, if you reinstall the Windows operating system, for some reason, all data on your computer will be lost. system disk. You will have to reinstall all programs and make other operating system settings.
Suddenly, due to hard drive failure or viruses, you may lose all your data, and lost data may not always be recovered by recovery specialists.
The way out of this situation is to create a backup copy of the system and other files you need. After a sudden system or equipment failure, you can restore all data from a backup copy. will be restored on your computer operating system, drivers, programs and other files that you archived.
Now you can move on to an overview of how archiving works in Windows 7.
To start a system backup, go to the Start menu => All Programs => Maintenance => Backup and Restore. You can also launch the built-in Windows archiving and backup tools from the “Start” menu => “Control Panel” => “Backup and Restore Files”.
It may happen that in case of serious problems with the operating system, you will not be able to boot the operating system in normal or in safe mode. Then you will have to use a Windows 7 installation disk, or a bootable USB flash drive with an operating system image recorded on it, to restore the system.
Boot Windows flash drive can be created using specialized programs, reviews of which you can read on my website in the "Programs" section.
In your absence installation disk with Windows 7 operating system, you should create a system repair disc. The recovery disk, which contains the recovery environment, can be used to boot the computer.
This system recovery disc contains recovery tools for the Windows operating system, using which you can restore the operating system after a serious error, or restore the system from a created system image.
For those users who have pre-installed operating systems on their computer, create boot disk System recovery is simply necessary. Computer manufacturers now often do not include a Windows installation disc with them. In this case, an emergency system recovery disk will help boot the computer to restore it if it is not possible to boot in any other way.
In the "Backup and Restore" window, you must click on the item "Create a system recovery disc" to create an emergency system recovery disc. In this case, you will have a rescue CD for system recovery in case of serious problems with the operating system.
After clicking on the item "Create a system recovery disk", the window "Create a recovery disk" opens. To create a system recovery disc, you need to insert an empty CD or DVD disc into the optical disc drive, and then click on the "Create disc" button.

Next comes the process of creating a system recovery disk. After completing the creation of the emergency recovery disk, you need to click on the "OK" button. Rescue disk Windows recovery 7 takes up about 150 MB.

You will now be able to access system recovery options using a bootable recovery disk if it is not possible to boot your computer using other methods.
To boot your computer from a rescue or installation disk, you will need to select in the BIOS the priority of booting from a CD/DVD reader, and if you use bootable flash drive With USB drive, to which such a bootable flash drive is connected.
If, when creating a recovery disc, you are prompted to insert an installation disc with the Windows 7 operating system, this means that the necessary files to create a system recovery disc were not found. In this case you will need to paste into optical drive computer installation DVD disc with Windows 7 operating system.
Using the installation Windows disk 7 or a rescue system recovery disk, you will be able to boot into your computer and have access to all operating system recovery options.
If you select “Create a system image” in the “Backup and Restore” window, then a system image will be created for its recovery, which includes copies of the disks necessary for the operation of the Windows operating system. You can include in the system image additional disks and use it for recovery in case of problems. However, you cannot use individual elements for recovery.
In the "Create a system image" window, you will need to select a location to store the backup.

In the “Create a system image” window, you will need to select the disks that you want to include in the backup. In this case, it will not be possible to add the disk on which the backup copy will be saved. Then click on the “Next” button.

In the new "Create a system image" window, you will need to confirm the archiving parameters and backup location. After that, click on the “Archive” button.

Now let's move on to the archiving and backup settings. In the “Backup and Restore Files” window, click on the “Set up backup” item.

Next, the “Archiving Settings” window opens. You will have to wait some time while data archiving starts. You will see the message “Starting data archiving” in the window, but the archiving itself is not yet happening.

Then the “Archive Settings” window opens. In this window, you must select a location to store the backup archive.
The best option for storing the system backup being created would be external hard disk. Because if you back up your copies on another partition of your computer's hard drive, then if the hard drive fails, then the operating system, your data, and the backups created for recovery will be lost forever. The data, in this case, is physically located on one hard drive, they are only located on different logical drives.
This image shows that the system itself suggested a storage location for me - an external hard drive, with enough space to create a backup copy.

In the Archive Settings window, you will need to select what to archive.
If provided Windows selection, the operating system will archive files saved in standard folders, in libraries, on the Desktop, and will also create a system image that will allow you to restore your computer in case of problems. All your data and settings will be archived, and you can restore your system from a backup if necessary.

In this case, you can select specific drives and select individual folders located on the selected drive. Be sure to check the box next to “Include disk system image: (C:)” so that you have the opportunity, if necessary, to restore the system from the created backup copy.
The data you select will be archived according to a schedule unless you start archiving manually. After completing the selection of objects for archiving, click on the “Next” button.

In the archiving settings window, you need to check the archiving settings again, and then click on the “Save settings and start archiving” button.

Before starting the backup, you can click on the "Change schedule" link to select your schedule or perform backups on demand.
If you do not perform archiving according to a schedule, but manually when you need it, then you will need to uncheck the box next to “Run archiving on a schedule (recommended)” and then click on the “OK” button.

Next, you will need to start archiving. The time it takes to create a backup will depend on the size of the disks and files that will be backed up, as well as the power of your computer. Repeated backups will be faster because only files that have changed since the previous backup will be overwritten.

Please remember that if you set up a scheduled backup, the external hard drive must be connected to your computer at the time. If you do backups without a specific schedule, then the best option Archiving will take place approximately once a month. In this case, you will retain the system settings that you made relatively recently.
Important data that you change frequently will need to be backed up more than once a month to always have an up-to-date backup version for recovery.
Sometimes, it is necessary to disable archiving if you have set up scheduled backups, and the disk where you save the backups runs out of free space. In this case, you will need to disable scheduled backups.
To do this, you will need to go to the “Start” menu => “Control Panel” => “Administration” => “Services”. In the "Services" window, you need to find the item "Block-level backup engine service (WBENGINE service is used to perform backup and restore operations)."
To disable automatic archiving, you must change the service startup type from “Automatic” to “Manual”. To do this, you need to click right click click on the “Automatic” item and select the “Properties” item in the context menu.
In the “Properties: Block-level archiving module service” window that opens, in the “General” tab, in the “Startup type” item, select “Manual” and click on the “OK” button. Next you will need to restart your computer. Now you can run the backup manually at your discretion.
If you are annoyed by messages that appear from time to time about the need to configure archiving from the Notification Panel (tray), then such messages can be disabled. To do this, go to the Start menu => Control Panel => Action Center. In the “Support Center” window, in the “Maintenance” field, in the “Archiving settings” item, you must click on the link “Do not receive any more messages on the topic: “about Windows archiving.”

Windows has a standard backup and recovery tool that allows you to save both individual files and an entire image from which you can restore the system in the event of a failure.
Go to the “Control Panel” by left-clicking on the “Start” button and selecting the appropriate item. In “Control Panel” select “System and Security” → “Backup computer data” → “Set up backup”.
Next, the system will ask you to specify a location to save the archive. Please note: if you want to backup data from drive C, you will not be able to save it there. To do this, you will have to select another medium, for example a second physical disk, flash drive, DVD or a folder on the local network. If we recall the principles of creating a backup, the archive must be stored on a separate medium, and not on the very computer from which the copy was made.
Next, the system will prompt you to automatically or manually select folders for archiving. Click on “Give me a choice” and in the window that opens, check the boxes for the folders you want to save. Click Next → Save settings and exit.
Now the “Archive” button appears in the “Backup or restore files” window. Clicking on it will start the process of archiving your data.
Recovery follows the same principle. To do this, click on the item “Select another backup to restore files” and indicate the one into which the backup was made.
The built-in File History tool allows for real-time archiving. For it to work, only initial setup is required.
Go to "Control Panel". To do this, click on the “Start” button with the right mouse button and find the desired line in the context menu.
As a storage location, select a disk other than the system one, a flash drive, or a network folder. Click Enable.
“File History” will automatically copy the following libraries: “Documents”, “Music”, “Images”, “Videos” - and standard user folders: Windows, “Desktop”, “Favorites”.
By default, backups are made every hour, but you can change this time, for example, to 10 minutes. However, this will require more disk space. The retention time for each copy can be configured in the Advanced Options menu.
Time Machine is a standard Apple solution designed for creating backup copies of applications, files and folders, documents, videos, and music.
To use Time Machine, you will need third-party storage, such as a flash drive, external hard drive, or network solution.
When you connect your external drive to your Mac, you should be asked: Should I use it as backup storage? Select "Use as backup drive."
If the window does not appear, you must select the backup disk manually:
Backups will be automatically created once per hour, copies for the past month - every day, and backups for the entire time - every week. Don't be afraid that the capacity of your hard drive will be small. Time Machine will only save changed information, and old copies will be automatically deleted as disk space becomes full.
Designed to create backup copies of Google account data. With its help you can save:
To create a backup you need:
To restore data on another device, just log in with your account. To restore the settings of saved applications, go to “Personal data” → “Recovery and reset” → “Auto recovery”.
Android has a standard synchronization tool that allows you to save user contacts, applications installed from Google Play, calendar, display settings, languages and input methods, Google Drive data and settings of some third-party applications. The tool requires a Google account.
Synchronization in Android is enabled by default. If you want to get the latest backup copy, do the following:
The data will automatically be sent to Google cloud storage. To restore them on another Android device, just connect your account to it.
You can also synchronize most popular accounts: Skype, Telegram, Viber and VKontakte. To sync photos and images, Android has a built-in Google Photo solution.
Apple's universal application for receiving and playing content. Allows you to locally save data from a device connected to a computer running Windows or macOS. This is especially convenient when you do not have Internet access.
To create a copy using iTunes, do the following:
Cloud service for storing user data. Like any cloud, it has two limitations: the need for Internet access and a relatively small (5 GB) amount of free allocated space.
To save data using iCloud on your device, open Settings → iCloud → Backup and start the process of creating a copy.
Saved in iCloud:
License: commercial software.
Russian language support: There is.
A simple solution for creating backups. Allows you to save both individual files (photos, music or movies) and mail files, for example from Microsoft Outlook or TheBat.
In the main program window, click “Create a new task” → “Create a backup copy”. From the directory tree, select the data you want to save. In our case, this will be the “Music” folder on the desktop.
Finally, give the task a name and click Finish. Archiving is complete.
Data recovery is performed using the same principle. Select the saved backup copy, and then select the location where you want to restore it.
The trial period for using the program is 30 days. The developers offer to purchase the full basic version for 800 rubles. There are other versions of Handy Backup - Professional and Expert. Their capabilities are much wider and tailored to professional needs; for our purposes, the Standard version is quite sufficient.
License: shareware.
Russian language support: No.
Another solution for creating backups and recovering lost files. The interface is so simple and clear that even the lack of Russian language will not be an obstacle.
First of all, choose where to save your data. Let it be a removable drive E.
The next step is to specify the data to be saved. The program offers both a smart selection, where you can mark desktop files, system folders “Pictures” or “Videos”, and a directory tree at once. Go to it and save the already familiar “Music” folder.
After clicking on the checkbox, the archiving window will open. On the selected drive, the program automatically creates a Genie TineLine folder, where it places the saved files.
Save and restore functions are available in the basic version of Genie Timeline Free. The advanced paid versions of Genie Timeline Home and Genie Timeline Pro have much greater capabilities: sending notifications by email, highly secure data encryption, and setting up a schedule. But for saving home files, the Free version is quite enough.
Genie TineLine has an iOS app that allows you to check the status of your backups on your computer.
License: commercial software.
Russian language support: There is.
A powerful tool for creating backups and restoring data. You can store backups not only on physical disks, but also on Acronis’s own cloud service. However, for this you will have to subscribe for a year, and the amount of space provided will depend on the tariff plan. With a standard subscription, 50 GB are allocated, when purchasing a premium version - from 1 TB.
Immediately after installation, the program prompts you to choose what data to send to the copy: from the entire computer, from disks and partitions, or individual folders.
Select "Files and folders" and select the ones you need. Let this again be the “Music” folder on the desktop. Click "OK" and proceed to select storage.
Select flash drive E, click “OK” → “Create a copy” again. A copy of the “Music” folder has been created on a flash drive.
Acronis also has other useful features. For example, “Archive” allows you to free up disk space by packing large files, and the “Disk Cloning” tool will create a complete copy of local disks, which will allow you to restore the system to its original state in the event of a failure.
The cost of the program is 2,700 rubles. A standard subscription for a year will cost users 2,400 rubles, an extended one - 5,100 rubles. Mobile applications work in conjunction with the desktop version and are downloaded for free.
License: commercial software.
Russian language support: No.
A utility for creating a duplicate disk. Russian language support is not provided, but understanding the interface will not be difficult.
In Source Disk, select the drive you want to copy. In Target Disk, specify the location to store the copy. Start the process with the Clone button.
The free period of using the program is 30 days. After Carbon Cope Cloner will cost 2,405.65 rubles.
License: shareware.
Russian language support: There is.
A convenient solution for creating backups and synchronizing applications on Android that does not require root rights. However, for full operation you will have to install Helium on a computer running Windows, Linux or macOS.
After installing the application on your smartphone, you will immediately receive a notification about the need for the desktop version. To make installation easier and save time, the program offers to send a link to a user-friendly messenger or email. From there follow the link to the program website, download and run. Installation in the style “Next” → “Next” → “OK” does not cause any difficulties.
While the program is installing, the mobile application asks you to connect the phone to the computer and enable USB debugging.
After receiving a notification about successful synchronization, you can disconnect your smartphone from the computer.
Open the mobile application. From the list of installed programs, select the ones you need and click on the “Backup” button. Specify where the backup will be stored and wait for the process to complete.
To restore from a backup, go to the “Restore and Sync” tab, select the storage location with the copy, select the desired applications and click “Restore”.
The basic version of the program is free, the cost of the extended version is 149.86 rubles.
The extended version allows:
Owners of Motorola devices and some Sony models will not be able to install the application.
License: shareware.
Russian language support: There is.
The most popular application backup tool among Android users. Requires root access to the device.
To create a backup copy of one or more applications, open the “Backups” tab, which provides a complete list of installed software. An exclamation mark next to an application indicates that a copy has not yet been created for it. The phone icon means that the program is stored on the device's internal memory. The SD card icon indicates applications stored on the memory card.
Select the application and click “Save” in the menu that opens.
The backup has been created. Now, if you enter the application again, you can see the “Restore” button.
Titanum Backup supports group work with applications and backups. To do this, go to “Menu” → “Batch actions”.
This function allows you to:
The functionality of Titanium Backup is much broader, but for our purposes the listed capabilities are quite sufficient.
The extended version of Titanium Backup costs 349 rubles. Its main features:
License: commercial software.
Russian language support: There is.
Compatibility: Microsoft Windows, macOS.
In fact, it is a file manager with backup capabilities. In many ways it is similar to iTunes, but working in it is much easier and more enjoyable. You can transfer data both via cable and via Wi-Fi, and in iMazing there is no limit on the number of connected devices.
When you connect your device to your computer, iMazing automatically makes a backup of it. The function of changing data directly in a saved copy is very useful: the next time you connect, the changed data is instantly synchronized.
The free period is 30 days, after which you will have to pay $39.99 for use on one computer.
License: commercial software.
Russian language support: No.
Compatibility: iOS.
A tool for backing up devices with . Allows you to save notes, contacts, photos, messages, call history and much more.
To create a backup, just select what you want to save and click on the corresponding icon. A copy can be stored on your smartphone, computer, in the cloud, or sent by email.
To restore data, click on the Restore button in the menu on the left side of the screen.
BackupAZ costs $2.99.
License: free software.
Russian language support: There is.
Compatibility: iOS.
And this software product will require you to have a jailbreak. The free iLex application allows you to save absolutely any data from your device, and it doesn’t require a computer to work.
Having created a backup copy, save it where it is convenient for you, and after flashing the device or in case of loss, copy the archive to your phone and restore the necessary information.
License: free software.
Russian language support: There is.
To do this, just go to Manage Accounts, enter your account and select Installable Purchases. But this can only be done for purchased applications. Cydia does not save information about free ones.
License: shareware.
Russian language support: There is.
Compatibility:
Allows you to store user data on Google servers, differentiate access rights to files and folders, open access and share them with other Internet users.
Storage includes:
15 GB is provided for free. For larger volumes you will have to pay from $2.99 to $299. The maximum storage capacity is 30 TB, and the maximum uploaded file is 5 TB.
2 GB of storage is available for free use. The cost of 1 TB will be 9.99 euros. Unlimited space can be purchased for 10 euros per month.
License: shareware.
Russian language support: There is.
Compatibility: browsers, Microsoft Windows, macOS, Android, iOS.
Cloud service of Russian origin, former Yandex.People. Like previous solutions, it allows you to save data in the cloud and share it with other Internet users. Supports synchronization between different devices.
Users are provided with 10 GB free of charge. For an additional 10 GB, Yandex asks to pay an additional 30 rubles, for 100 GB - 80 rubles, and the cost of 1 TB will be only 200 rubles.
Backing up your iPhone and iPad is extremely important. Regular creation copies of all mobile device data allows you to secure them as much as possible, as well as be able to restore the gadget in case of theft, loss, breakdown or replacement. Most iPhone and iPad users are aware of this and create copies of their devices from time to time. However, recent polls in our group "In contact with" showed that the percentage of people who know about the need to create backups is still far from 100. That is why we wrote this guide, which is extensive and covers various methods for creating backup copies of iPhone and iPad, including non-standard ones.
So, what is a backup and why is it needed? To put it most plain language, then a backup is all the data from your iPhone stored on your computer or in cloud storage in encrypted form. A backup copy is needed in order to restore, if necessary, any previously existing iPhone data. Restoration may be needed in a variety of cases, but most often with:

Obviously, if you value the data of your iPhone, even if it is not gigabytes of unique photos, but “only” a contact book, it is imperative to make a backup copy of the device. You can create it in three main ways, which we described below. However, before moving on to them, let’s clarify what exactly is saved in the backup copy.
Both iTunes and iCloud create backups with the following content:
You most likely noticed that the copy does not include the applications themselves, but only information about them and their settings. For this approach, thanks should be said to Apple, because, otherwise, the backups would grow to indecent sizes. Now to the methods.
The first way is using cloud service iCloud. It involves creating a backup copy of data from an iPhone or iPad without using wires. All information in this case is stored on servers Apple, in a highly encrypted form, so you should not worry about the safety of data.
Backing up your iPhone or iPad to iCloud is not for everyone. The fact is that only 5 GB is available for free on iCloud. If the size of the data being backed up exceeds this amount, iOS will issue a warning that the backup cannot be created.
Please note that to back up your iPhone or iPad to iCloud, you must have active connection to Wi-Fi.
Settings» → iCloud → « Backup copy" On devices running iOS 10.3 or later new version Software, iCloud section can be found by going to the management page account, which is located at the very top of the list of parameters (above “ Airplane mode»).
 Step 2: Activate the switch " iCloud backup" Enabling the function will result in a message indicating that the mobile device will no longer be backed up on the computer. Click " OK».
 Step 3: Wait for the backup feature to turn on.
 Step 4: Connect your iPhone or iPad to a power source, to Wi-Fi, and lock it. The backup will start automatically.
Like this in a simple way The function of backing up your iPhone or iPad to iCloud is enabled. It is important to note that the process of creating a copy of iOS begins only if the gadget is charging, has a Wi-Fi connection and is locked. However, it is not necessary to fulfill all the requirements for creating a copy in iCloud, you can force the system to make a backup.
Step 1: On iPhone or iPad, go to the menu Settings» → iCloud → « Backup copy».
Step 2: Click " Create a backup" at the bottom of the page. Creation of the copy will begin immediately.
 One point worth noting here too. No notification that your backup was successfully created iOS devices won't do it. You can verify the success of the operation yourself by going to the menu “ Settings» → iCloud → « Backup copy" There will also be displayed information about how much time is left before the end of the copy, if it is still being created.

The size of an iPhone or iPad backup to iTunes is only limited by the amount of storage on your computer. If your mobile device has a lot of data, for example, entire collections of photos and videos, then, of course, it should be backed up through iTunes.
Step 1: Connect your iPhone or iPad to your computer using USB cable and launch iTunes. If iTunes is not installed on your computer, download current version you can on official Apple website .
Step 2: Select your device in the iTunes window.
 Step 3: On the "" tab Review" (opens by default) check the box " This computer».
 Step 4: Click " Create a copy now» to start backing up your iPhone or iPad. Before doing this, you can activate the option " Encrypt local copy» to set a password for the backup. The main thing after this is not to forget the specified password, since in this case, recovery from the copy will be impossible.
  Step 5: Wait for the backup to complete. The mobile device cannot be disconnected from the computer during the procedure. Please note that creating a copy can take quite a long time, especially if a lot of content is saved on your device.
As you can see, creating a backup in iTunes is also not difficult. In addition to iTunes, various third-party applications can help with creating a backup.
This function is offered by most modern file managers For mobile devices Apple, but, unfortunately, almost all of them are paid. There are two free and tested options by us: iTools And iMazing .
Let us say right away that in general these programs are not ideal. Latest Versions iTools, although Russified, but during installation they show an unpleasant window with a message on Chinese. There is nothing dangerous about this, but it is very scary for users. iMazing, in turn, reveals all its functionality only upon purchase full version. However, it is the iPhone and iPad backup function that we are interested in that is also available in free version iMazing.
Why backup your iPhone at all? third party applications? There is really no urgent need to create them. However, many users want to keep important files, such as memorable photos and videos, extra secure. And for these purposes they help alternative ways creating backups.
The process for creating a backup in any of these tools is the same. Let's look at the operation using the example of the completely free iTools utility.
Step 1. Download iTools from official website of the program and unpack the archive with the utility.
Step 2: Launch iTools and connect your iPhone or iPad to your computer. iTunes must be installed on your computer, otherwise iTools will not be able to detect the device.
Step 3: Once the iPhone or iPad shows up in iTools, go to the " Tools».  Step 4: Click " Backup».
 Step 5. In the window that opens, check the boxes for the types of content that should be saved in the backup copy and click “ Further».
 Step 6. Wait for the content to be identified and click " Launch" You can first select the folder in which the backup will be saved by clicking " Change».
 Once the backup process is complete, you can check the result. You'll notice that unlike iCloud and iTunes, iTools doesn't encrypt files in any special way. This makes it possible to access the same photos from your iPhone or iPad without using additional utilities.
 How to restore backup data on iPhone
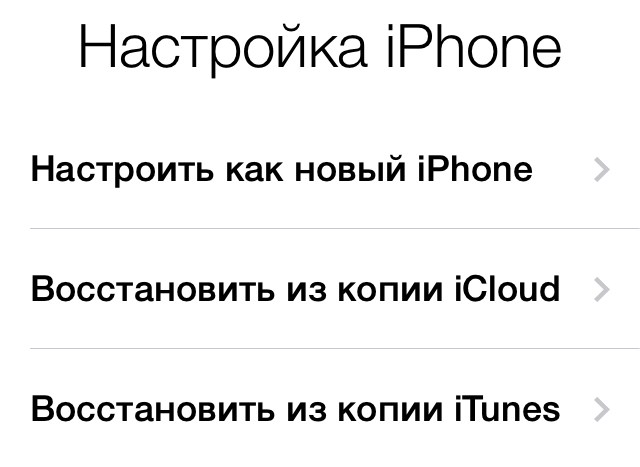
We've sorted out creating backups, now let's look at an equally important process iPhone recovery and iPad of them. Restoring iOS devices from iCloud and iTunes is possible if they initial setup, or after full reset. The user is only required to follow the steps in the system's starting manual. Selecting the recovery type (or settings if the device is new) must be done on the “ iPhone setup».
 It is quite obvious that if you have previously created a backup copy in iCloud, then you should select the “ Recover from iCloud copy" Everything is the same with a copy in iTunes, to restore from which you will have to select “ Recover from iTunes copy", then connect the gadget to the computer and launch iTunes.
Backups can take up a lot of space, both in iCloud and on your computer. Backups that have become unnecessary, of course, need to be deleted, freeing up precious space. Fortunately, this is done very simply, both in iCloud and in iTunes.
Step 1. Go to menu " Settings» → iCloud.
 Step 2. Select " Storage» → « Control».
 Step 3. In the section " Backups» select the device copy you want to delete.
 Step 4. Wait for the backup to be identified and click " Delete copy».
 Step 5: Confirm deletion.
Step 1: Launch iTunes.
Step 2. Go to menu " Edit» → « Settings».
 Step 3. Select the settings section " Devices».
Step 4: Select the backup you want to delete and click the " Delete backup».  Step 5: Confirm deletion.
Note that on a Mac, the process for deleting backups is almost the same, with one exception. You need to select the menu in the program parameters iTunes → « Settings».
 We hope that the information provided in this material was useful to you. In one of the following materials we will talk about advanced ways to manage backups that even many people don’t know about experienced users. Stay with us, it will be interesting!
Please rate this article 5 stars if you like this topic. follow us


